Die Clash Overlays for Half Cents: All Design Types (1793–1857)
Die clashes occur when the obverse and reverse dies strike each other without a planchet between them, leaving impressions of the opposing die's design elements on each die. When coins are subsequently struck from those clashed dies, faint mirror-image traces of the opposite side appear on the coin.
The overlay images below show each half cent design with the obverse and reverse superimposed, illustrating exactly where design elements overlap. These overlap areas are where clash marks will appear on die-clashed coins. On the obverse, look for traces of the wreath; on the reverse, look for traces of Liberty's portrait.
How to Read These Overlays
Each overlay shows the obverse and reverse images stacked on top of each other. The areas where elements from both sides intersect are where clash marks can theoretically appear. In practice, clash marks are most visible on the open-field areas of the coin — the flat spaces between design elements where an impression from the opposite die has room to show.
Liberty Cap Half Cent — Left Facing (1793)
Overlay: 1793 Liberty Cap (left-facing) half cent — obverse and reverse superimposed.
The 1793 Liberty Cap left-facing half cent was produced for only one year and in limited quantities. No confirmed die clashes have been documented for this type. The design features a large portrait of Liberty facing left with a Phrygian cap on a pole behind her, with a wreath and denomination on the reverse. If a clash were to occur, traces of the wreath would appear in the open fields around Liberty's portrait, and traces of the profile would appear within or around the wreath on the reverse.
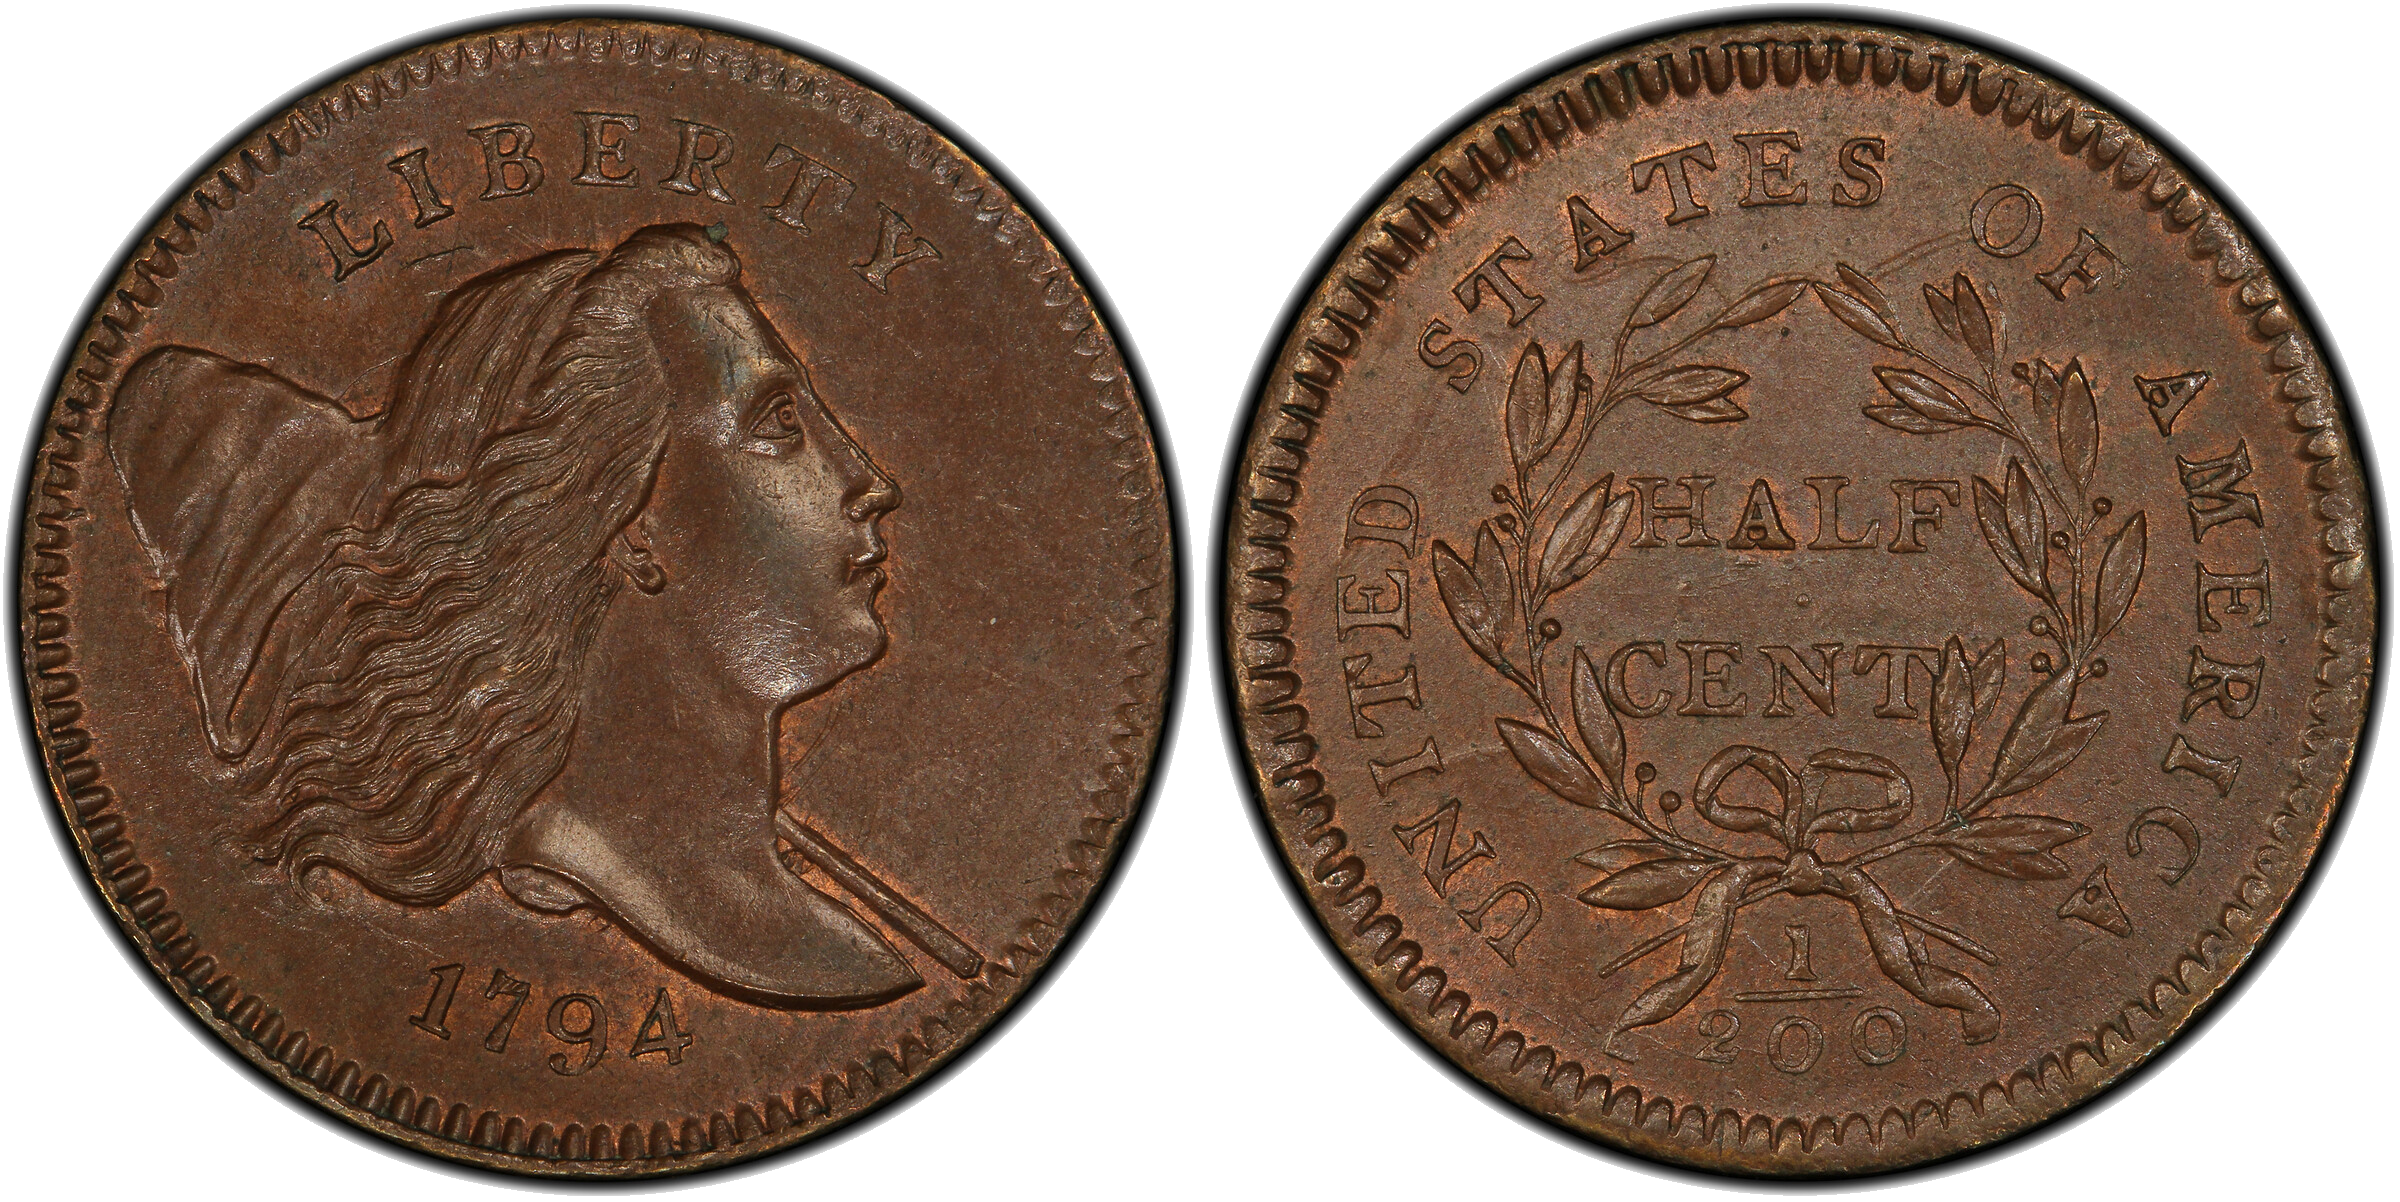
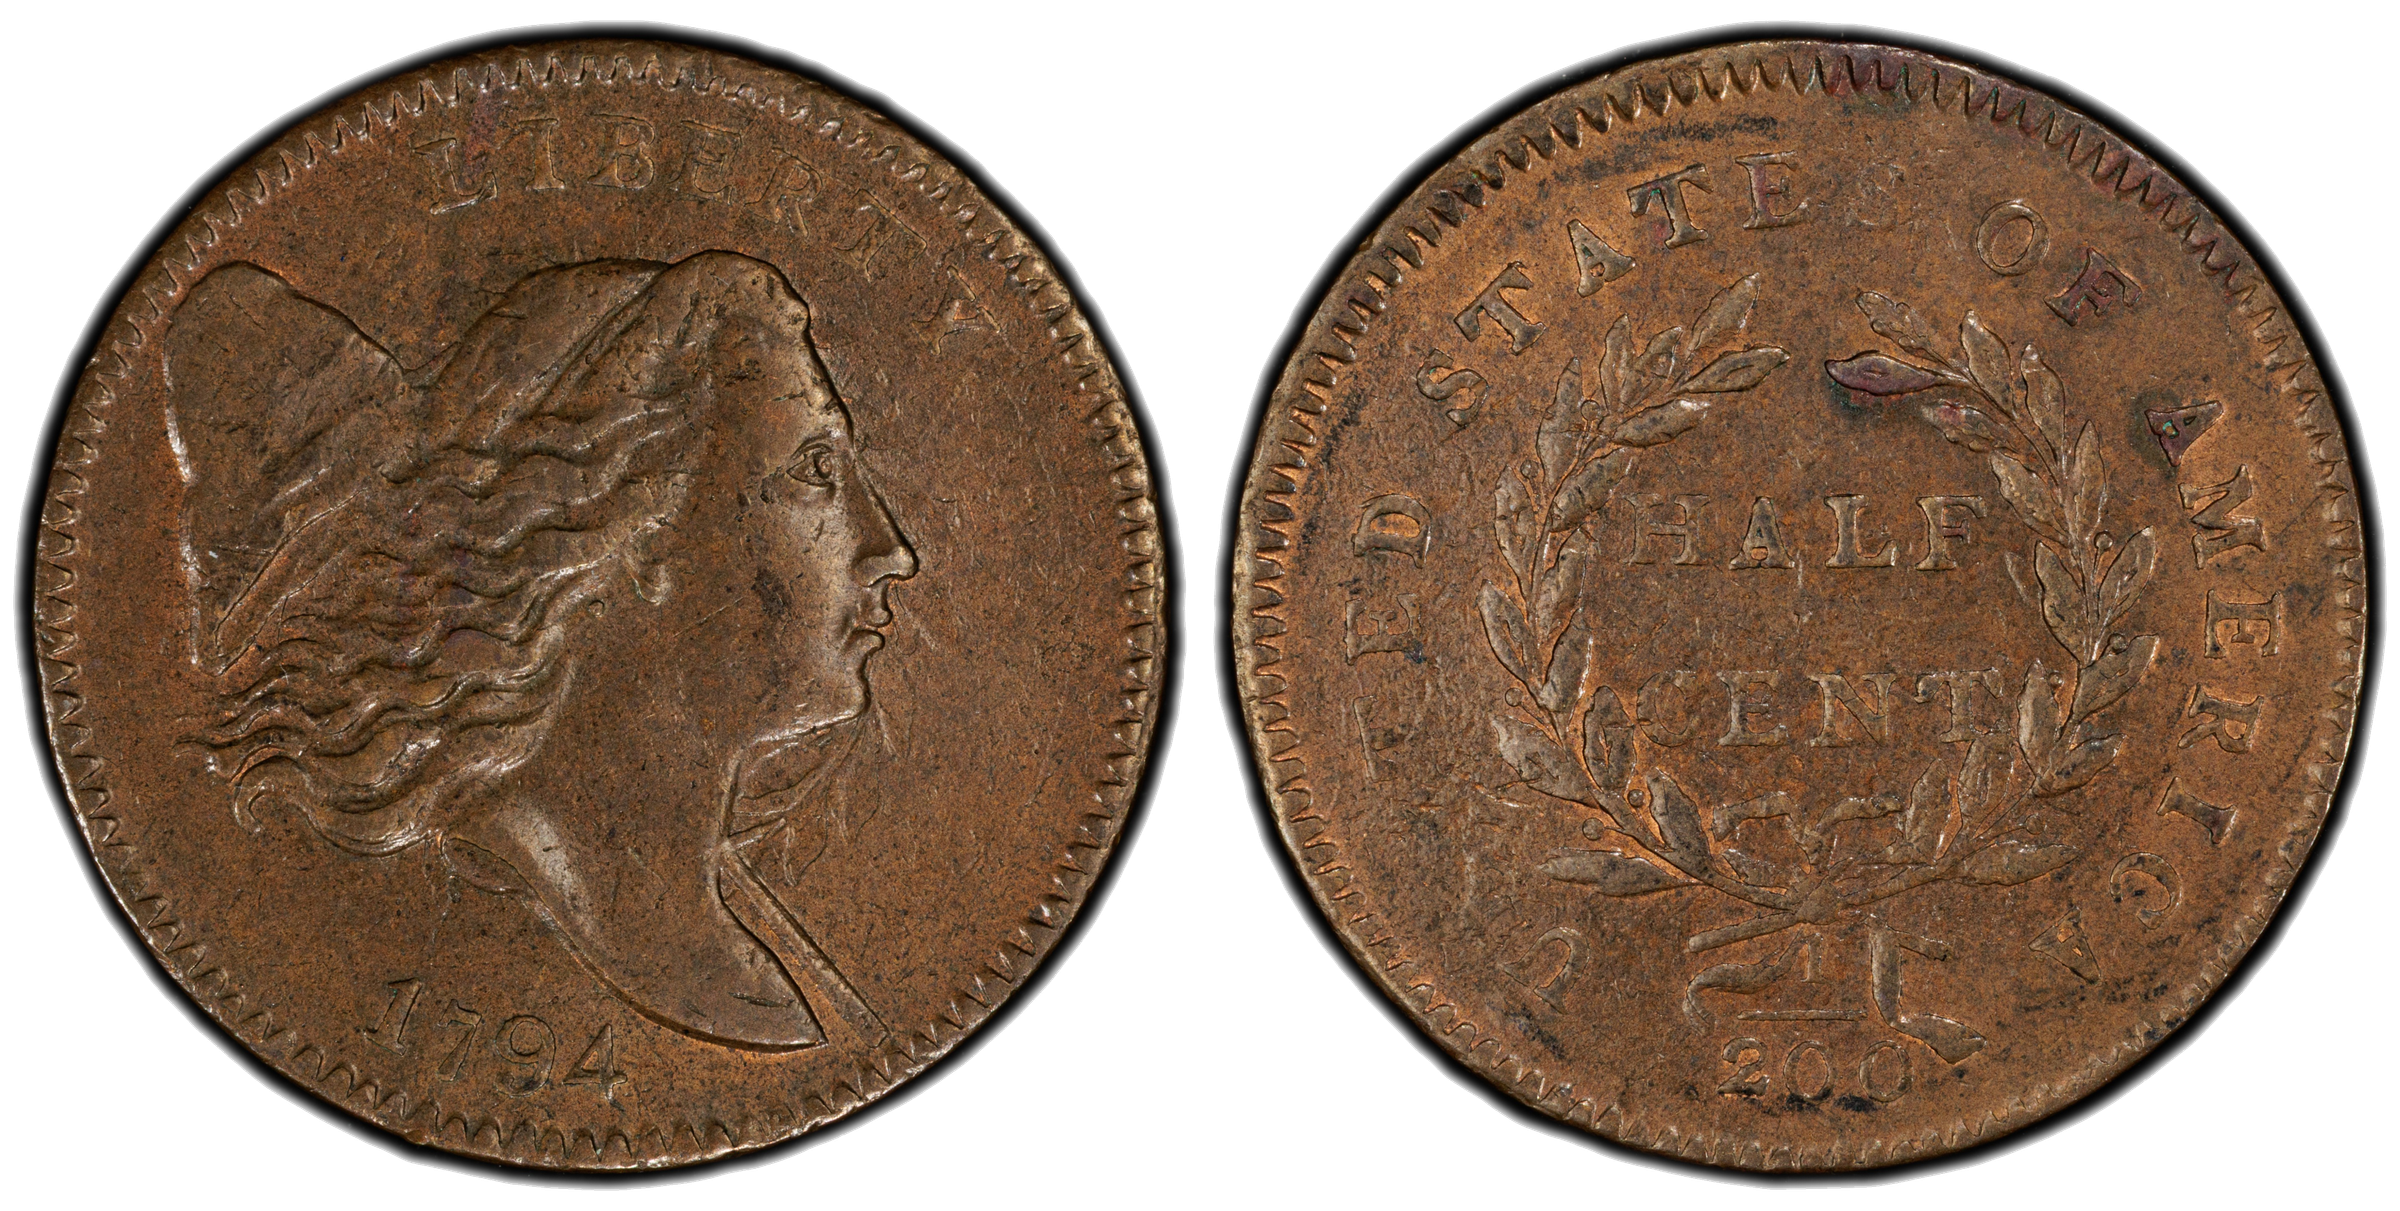
Liberty Cap Half Cent — Right Facing (1794–1797)
Overlay: 1794 Liberty Cap (right-facing) half cent — obverse and reverse superimposed.
The right-facing Liberty Cap half cent has documented die clashes in several years of the series. The most commonly seen clash marks involve the high-relief elements: traces of Liberty's portrait appearing within the wreath on the reverse, and traces of the wreath leaves appearing in the field around Liberty on the obverse. Letter clashes from the reverse legends are theoretically possible on the obverse, but no confirmed examples have been located.
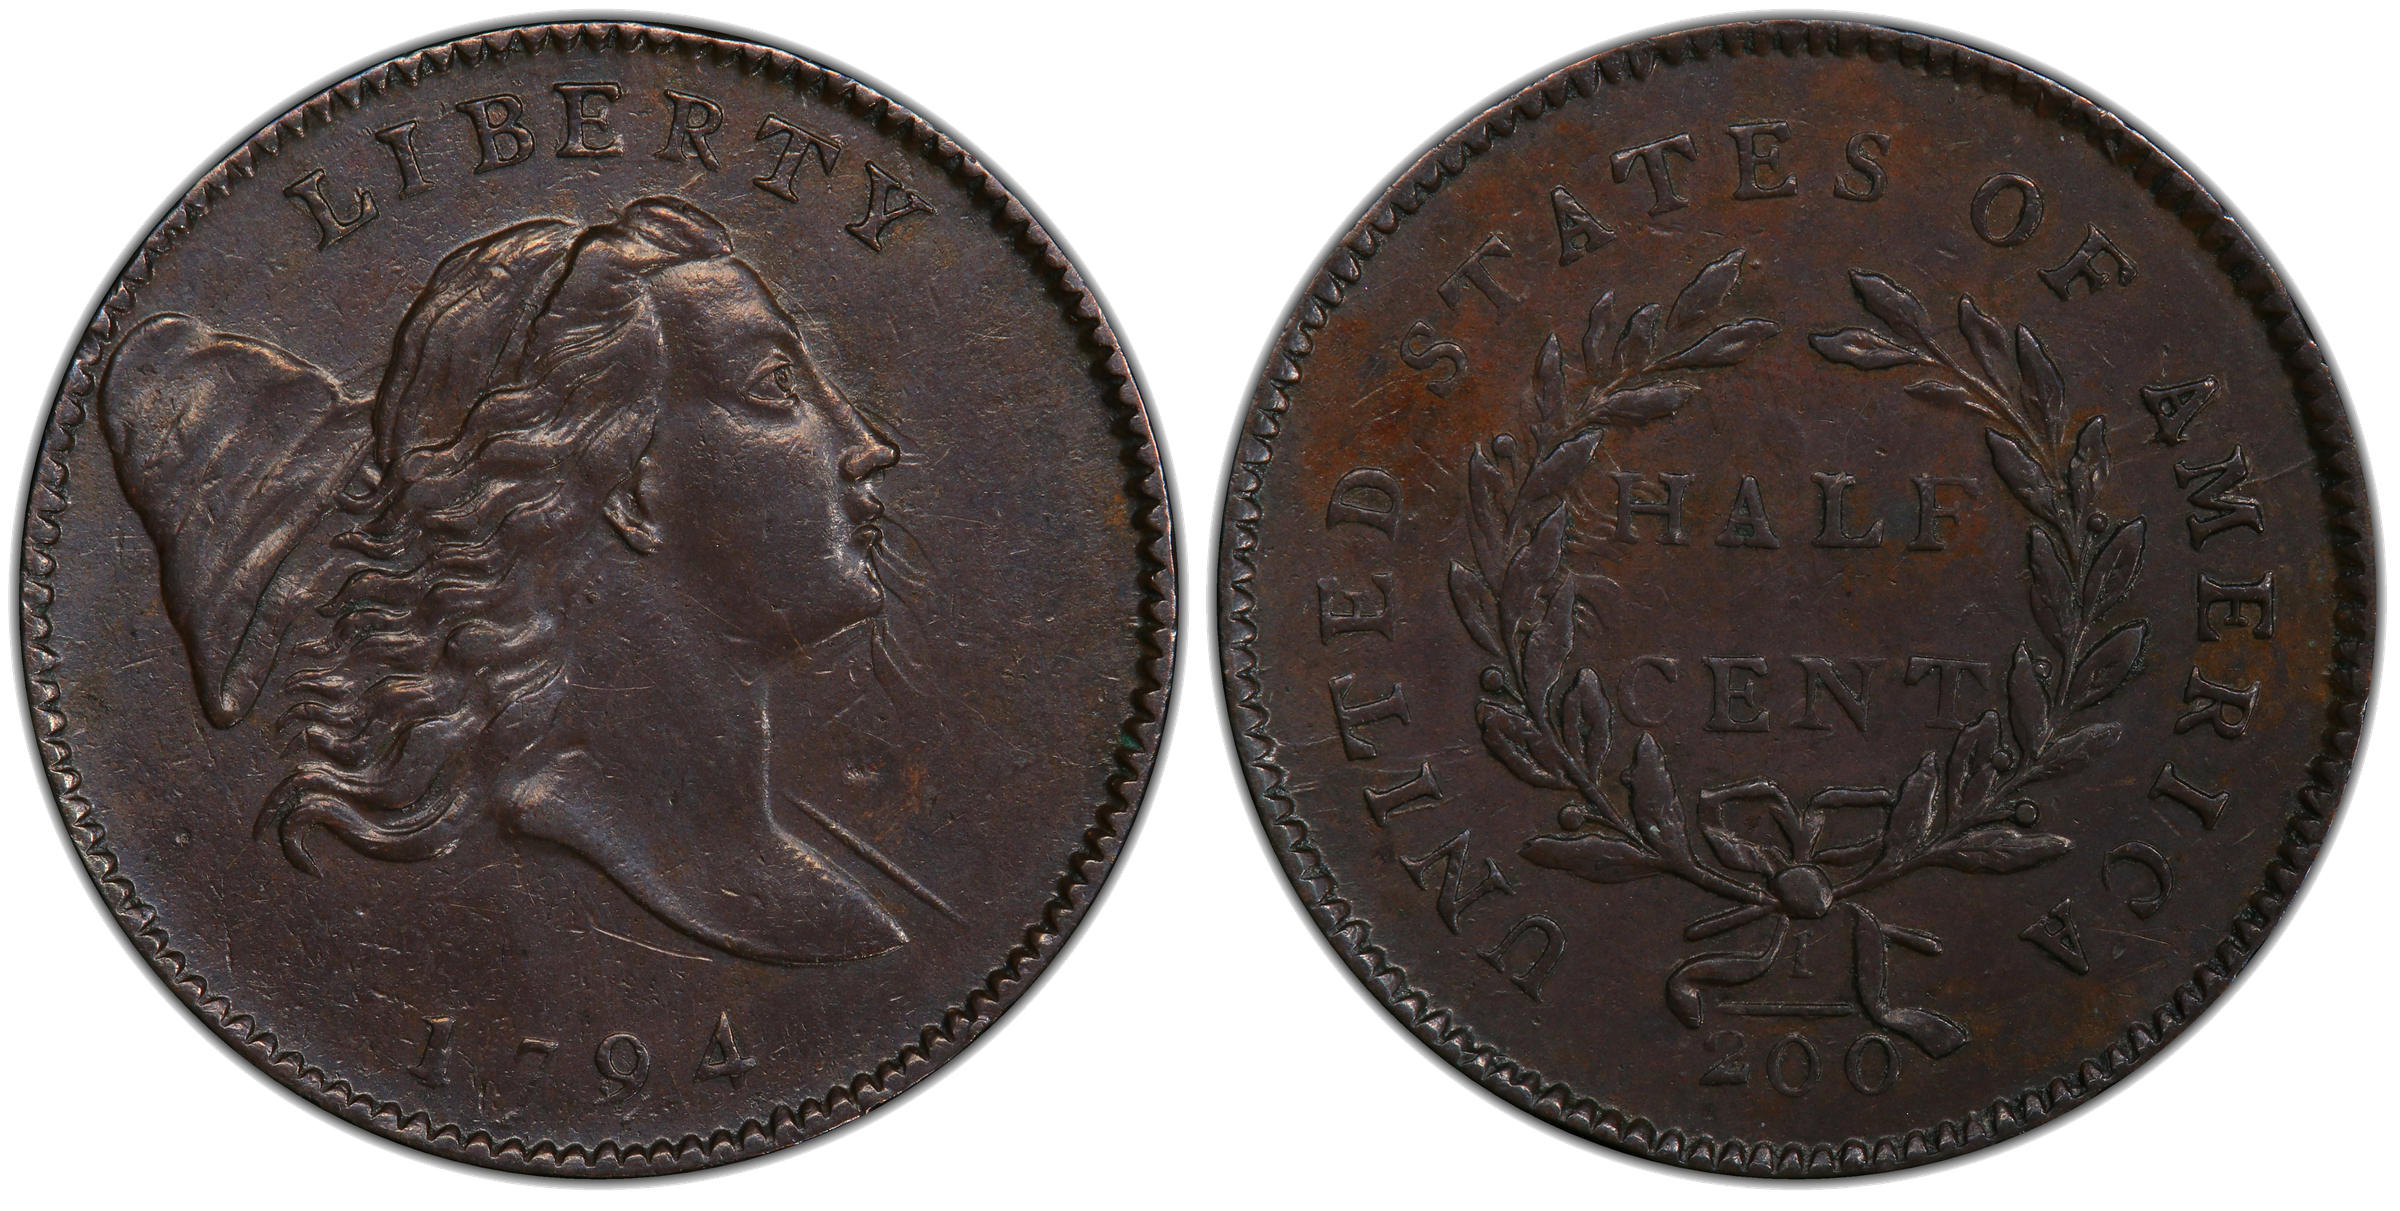
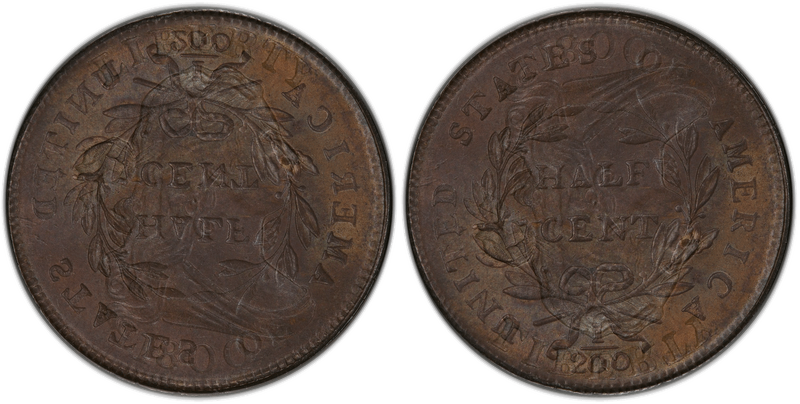
Example: 1794 Half Cent — Die Clash
1794 half cent with die clash. On the obverse, faint traces of the reverse wreath are visible in the field around Liberty's portrait and the portrait on the reverse.
Another 1794 half cent die clash example showing the transfer of design elements between the dies.
A third 1794 half cent showing die clash marks — note how the severity can vary depending on the force of the impact between the dies.
Example: 1795 Half Cent — Die Clash
1795 half cent exhibiting die clash marks. This coin also shows an spiked head die crack (SKH).
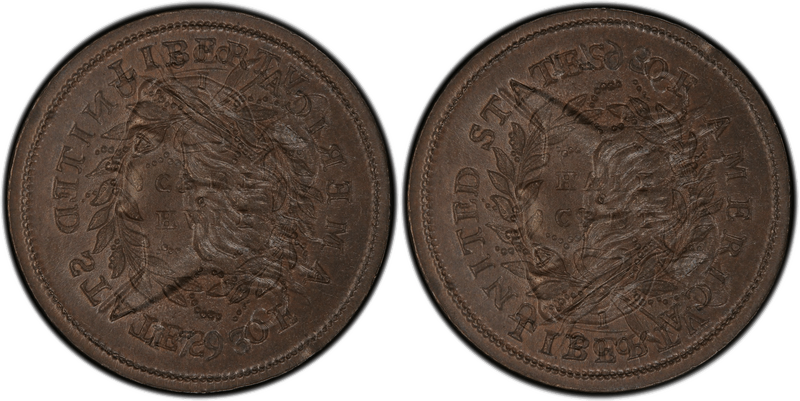
Draped Bust Half Cent (1800–1808)
Overlay: 1800 Draped Bust half cent — obverse and reverse superimposed.
No confirmed die clashes have been documented on Draped Bust half cents, though the possibility exists. If they were to occur, the most likely clash marks would involve the high-point design elements: Liberty's draped bust profile transferring onto the reverse within or near the wreath, and the wreath transferring onto the obverse in the field around Liberty. The wreath on Draped Bust half cents is similar in size and position to other early copper types, so the overlap areas shown in the overlay above indicate the zones where marks could theoretically appear.
Classic Head Half Cent (1809–1836)
Overlay: 1809 Classic Head half cent — obverse and reverse superimposed.
Classic Head half cents have documented die clashes in several years of the series. As with other half cent types, the most common clash marks involve the high-relief design elements: Liberty's Classic Head portrait appearing as faint traces within the wreath on the reverse, and wreath elements appearing in the field around the portrait on the obverse. Clashes involving the stars on the obverse or the lettering from either side are theoretically possible but have not been confirmed in known examples.
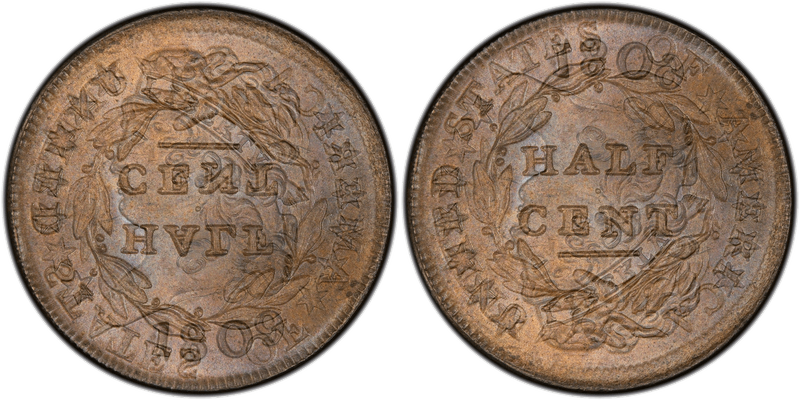
Example: 1834 Half Cent — Die Clash
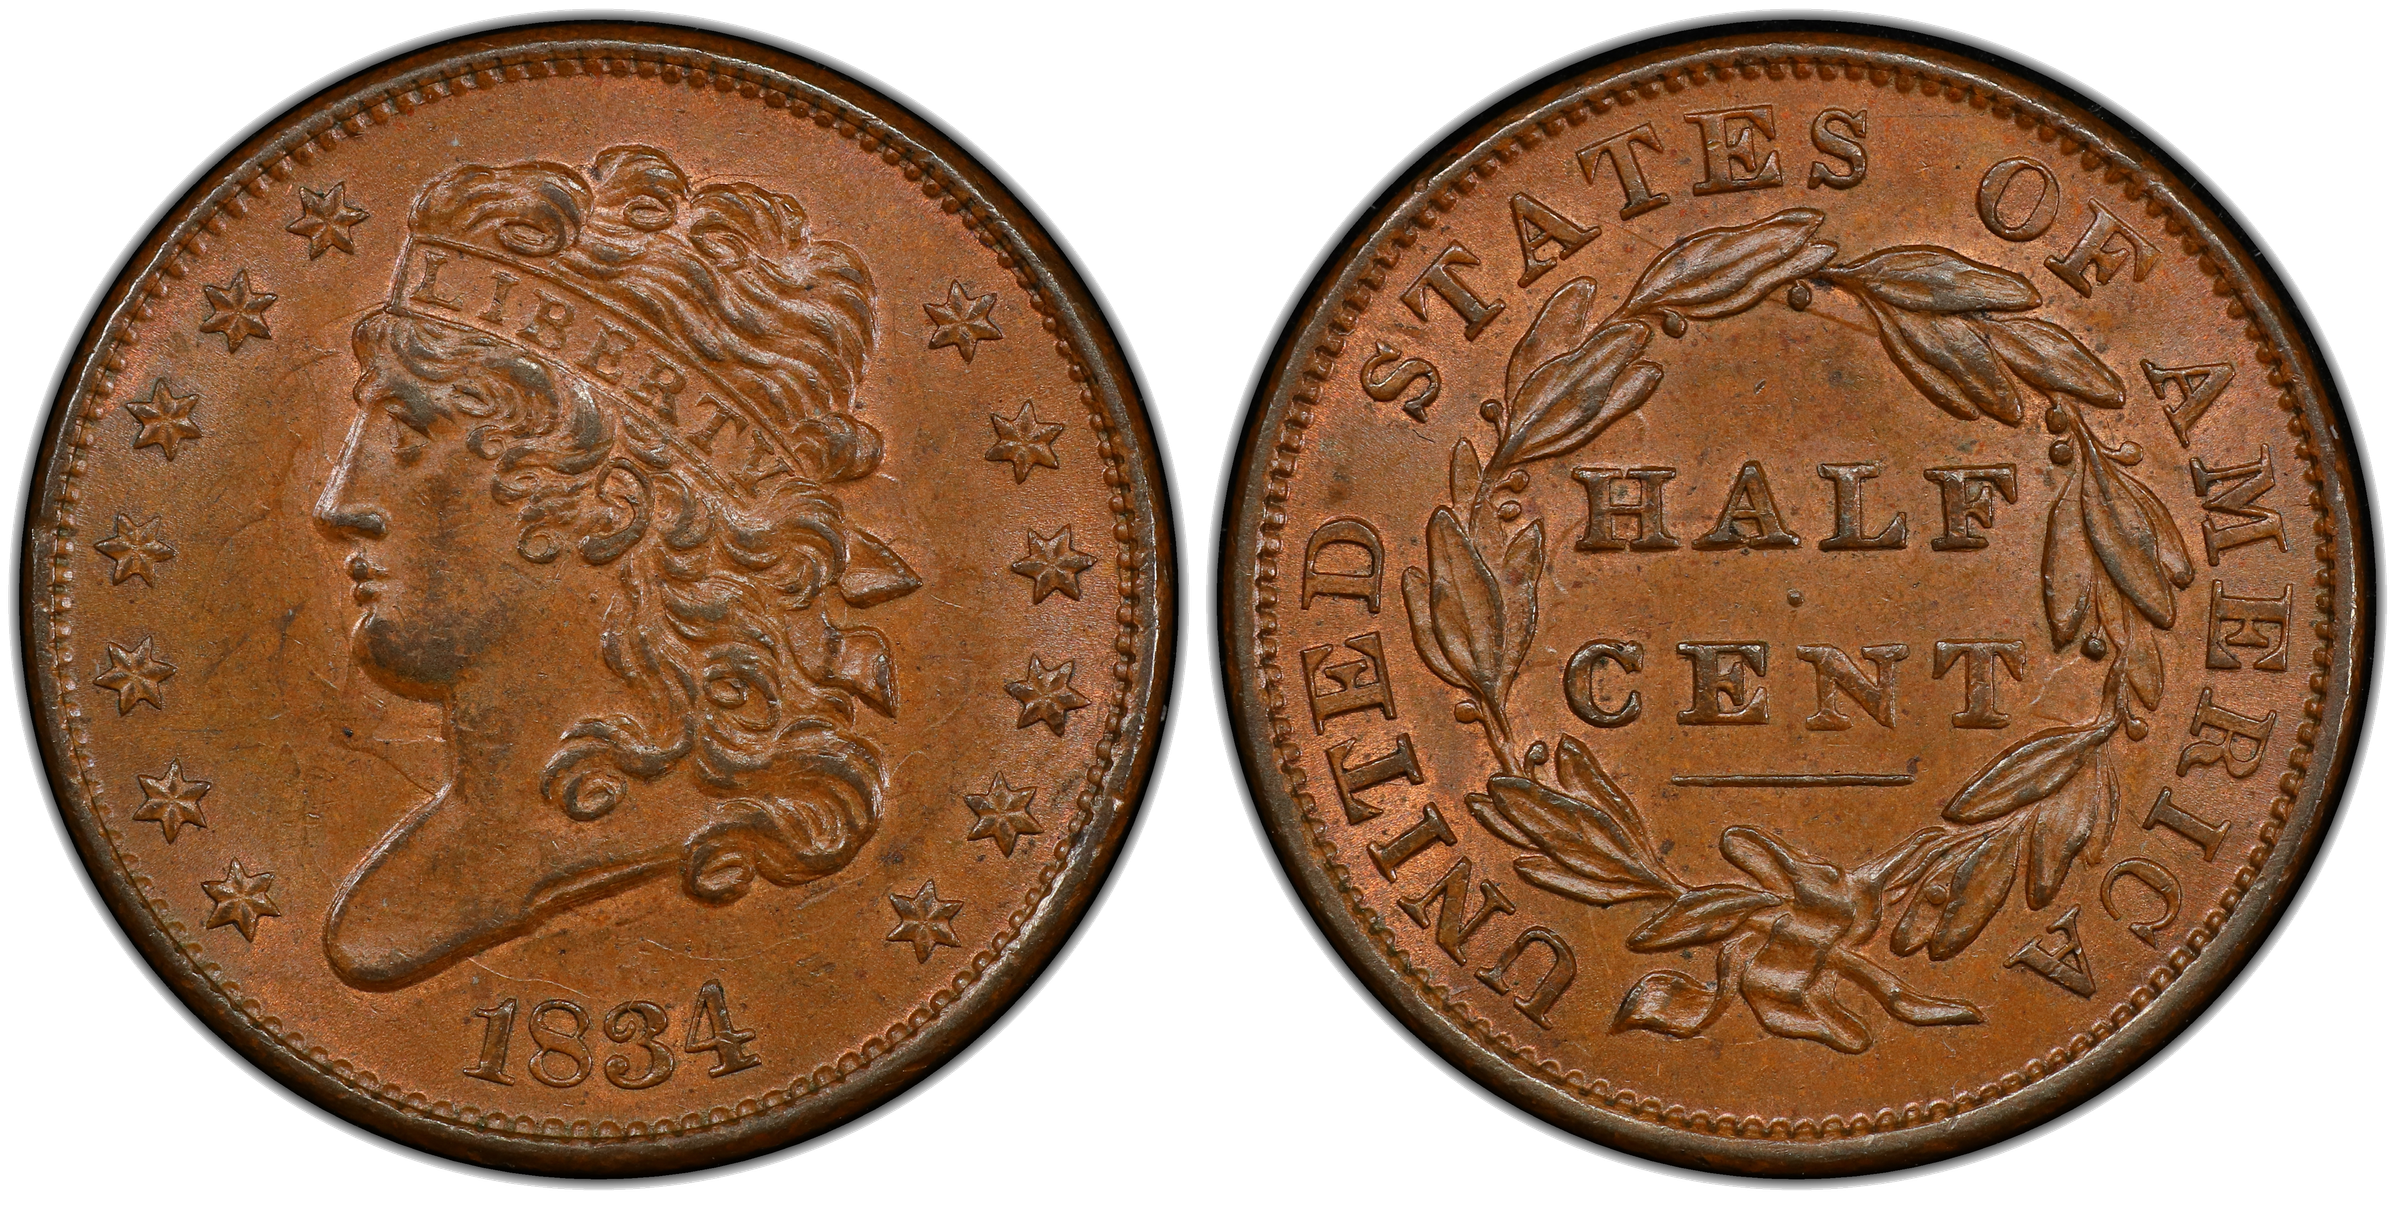
1834 Classic Head half cent with die clash marks visible on both the obverse and reverse.
Example: 1835 Half Cent — Die Clash
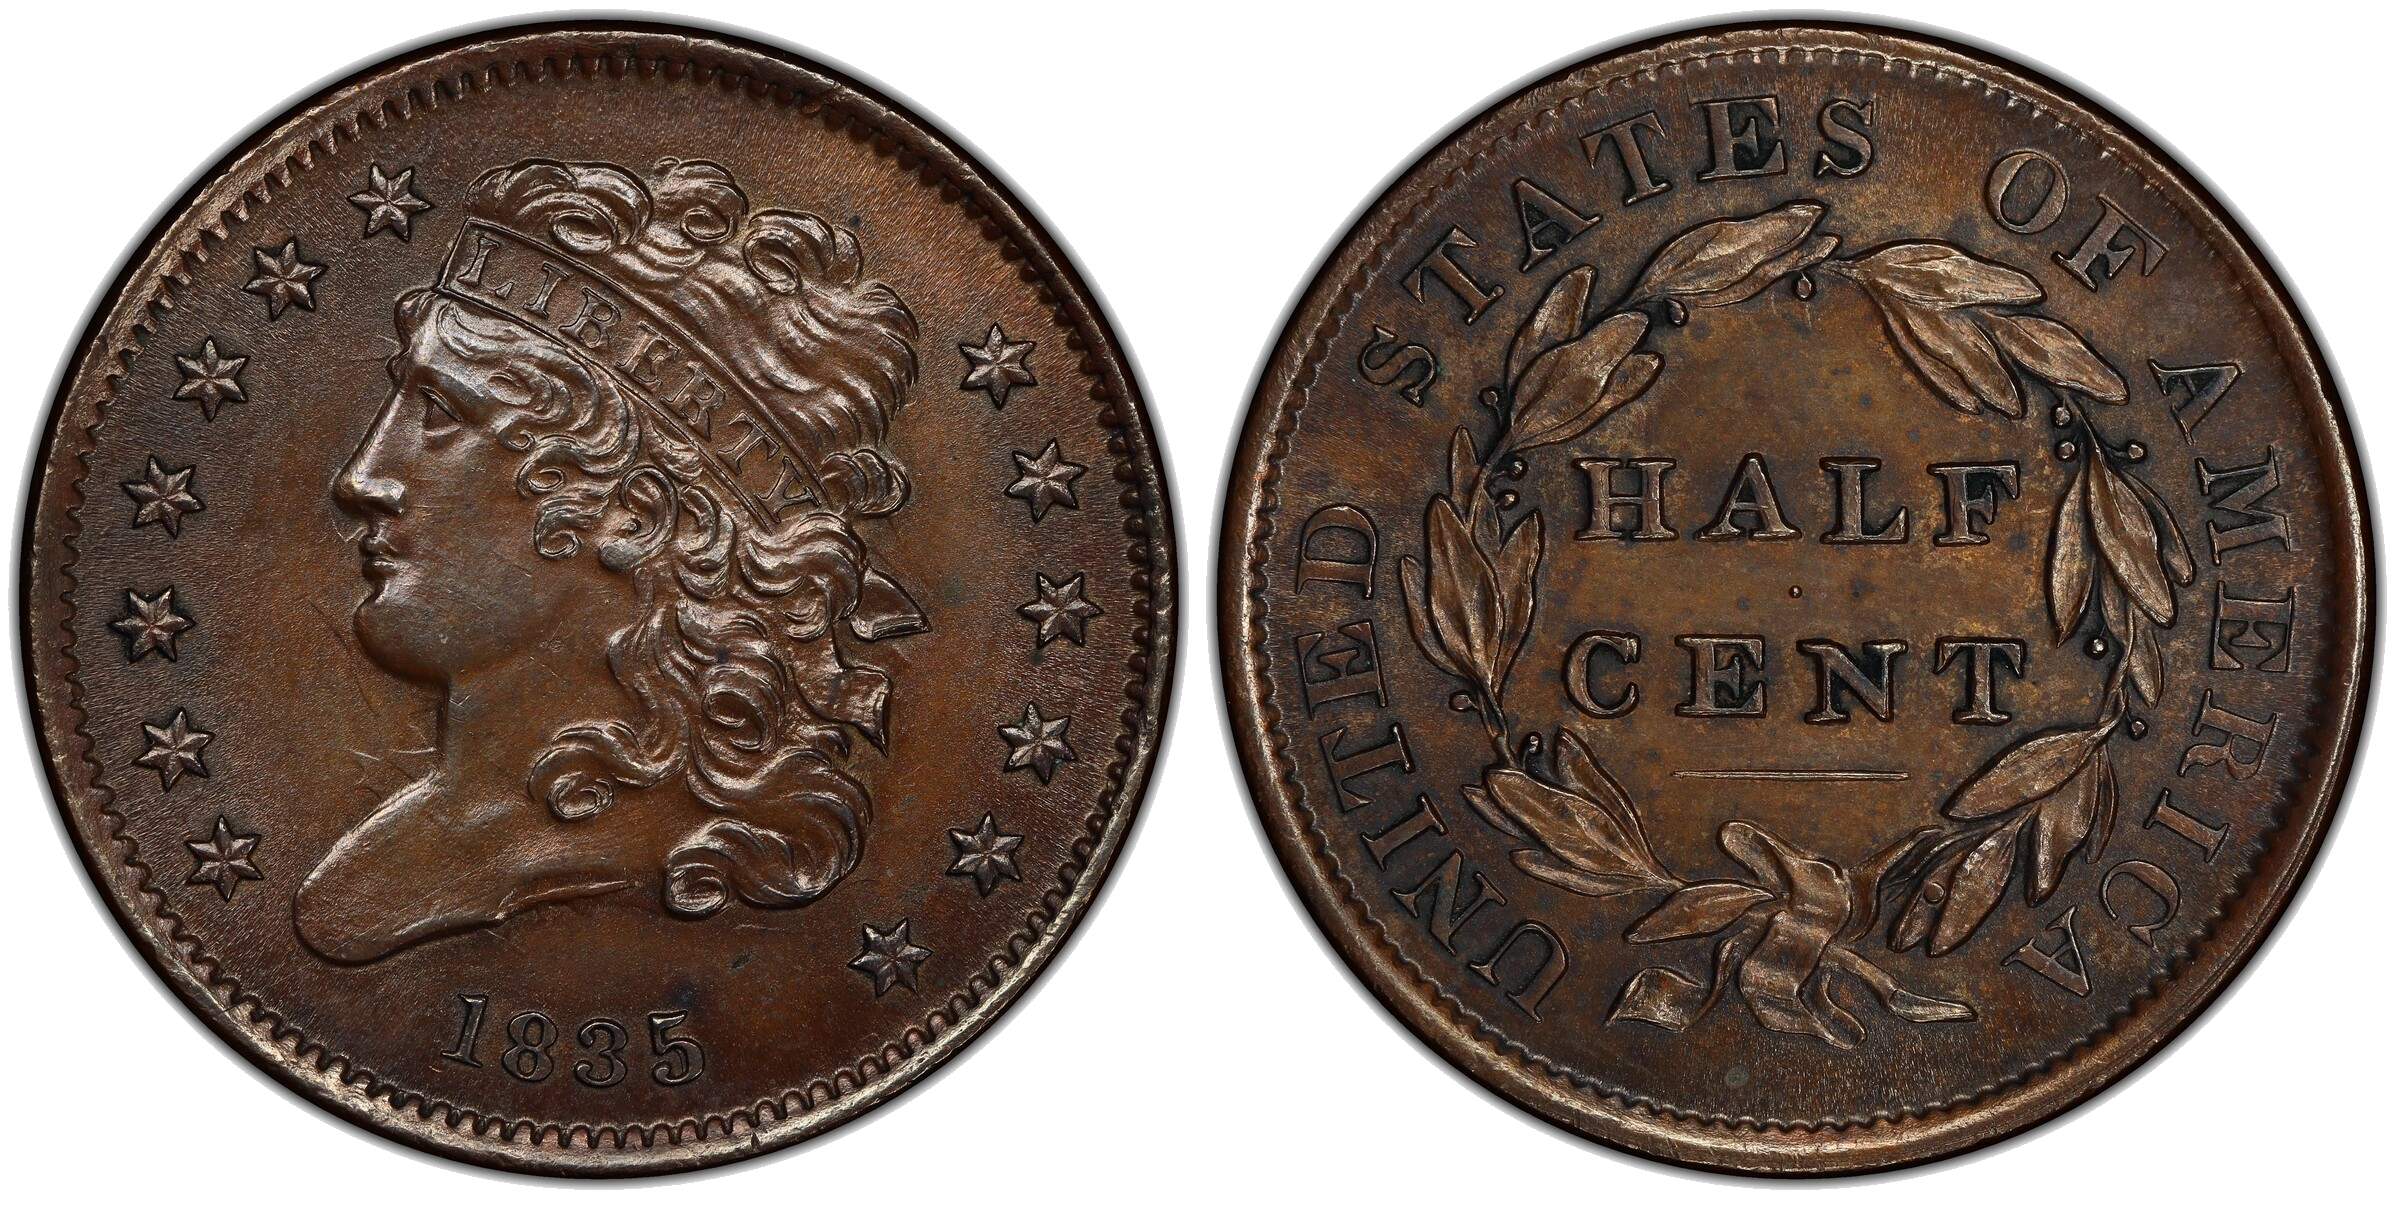
1835 Classic Head half cent with die clash — note the traces of the wreath visible on the obverse around Liberty's portrait.
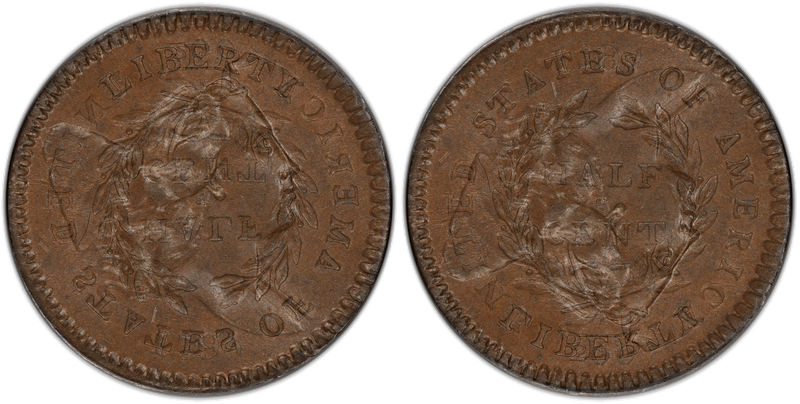
Braided Hair Half Cent (1840–1857)
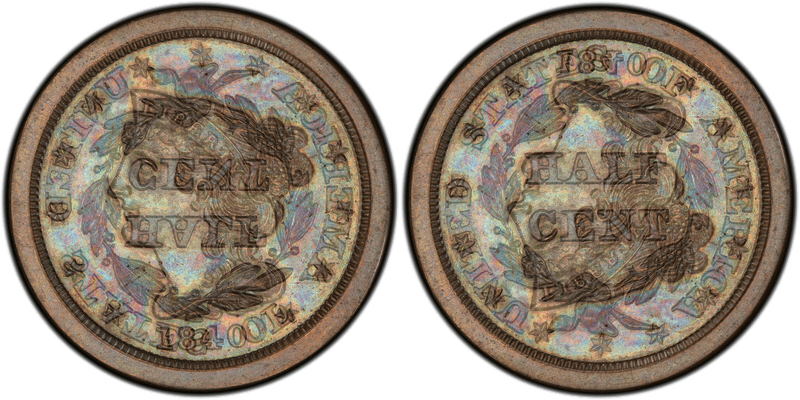
Overlay: 1840 Braided Hair half cent — obverse and reverse superimposed.
No confirmed die clashes have been documented on Braided Hair half cents. This type was produced primarily as proof issues from 1840–1848 and for circulation from 1849–1857, with relatively low mintages throughout. If die clashes exist on this type, the expected clash areas would be consistent with other half cent designs — Liberty's portrait transferring to the reverse wreath area, and the wreath transferring to the obverse field. The overlay above shows these potential overlap zones.
Summary: What to Look for on Half Cent Die Clashes
Across all half cent design types, the consistent pattern for die clash marks is:
On the obverse: Look for faint traces of the reverse wreath in the open fields around Liberty's portrait, particularly in the area between the portrait and the rim.
On the reverse: Look for faint traces of Liberty's profile within or near the wreath, especially in the central open area around the denomination text.
Letter clashes: While theoretically possible (reverse legend text appearing on the obverse or vice versa), no confirmed letter clashes have been documented on any half cent type.
The Liberty Cap right-facing type (1794–1797) and the Classic Head type (1809–1836) have the most documented die clashes in the series. When examining half cents for clashes, use a loupe of at least 5x magnification and examine the coin under angled lighting to reveal the subtle raised lines that indicate clash marks.