How to Photograph a Coin So Others Can Actually Help You Identify It
Better Photos = Better Answers
The quality of the help you get when posting a coin for identification is directly tied to the quality of your photos. A blurry, poorly lit photo makes it nearly impossible for even expert collectors to evaluate your coin. A clear, well-lit photo can get you a definitive answer in minutes.
What a Good Coin Photo Looks Like
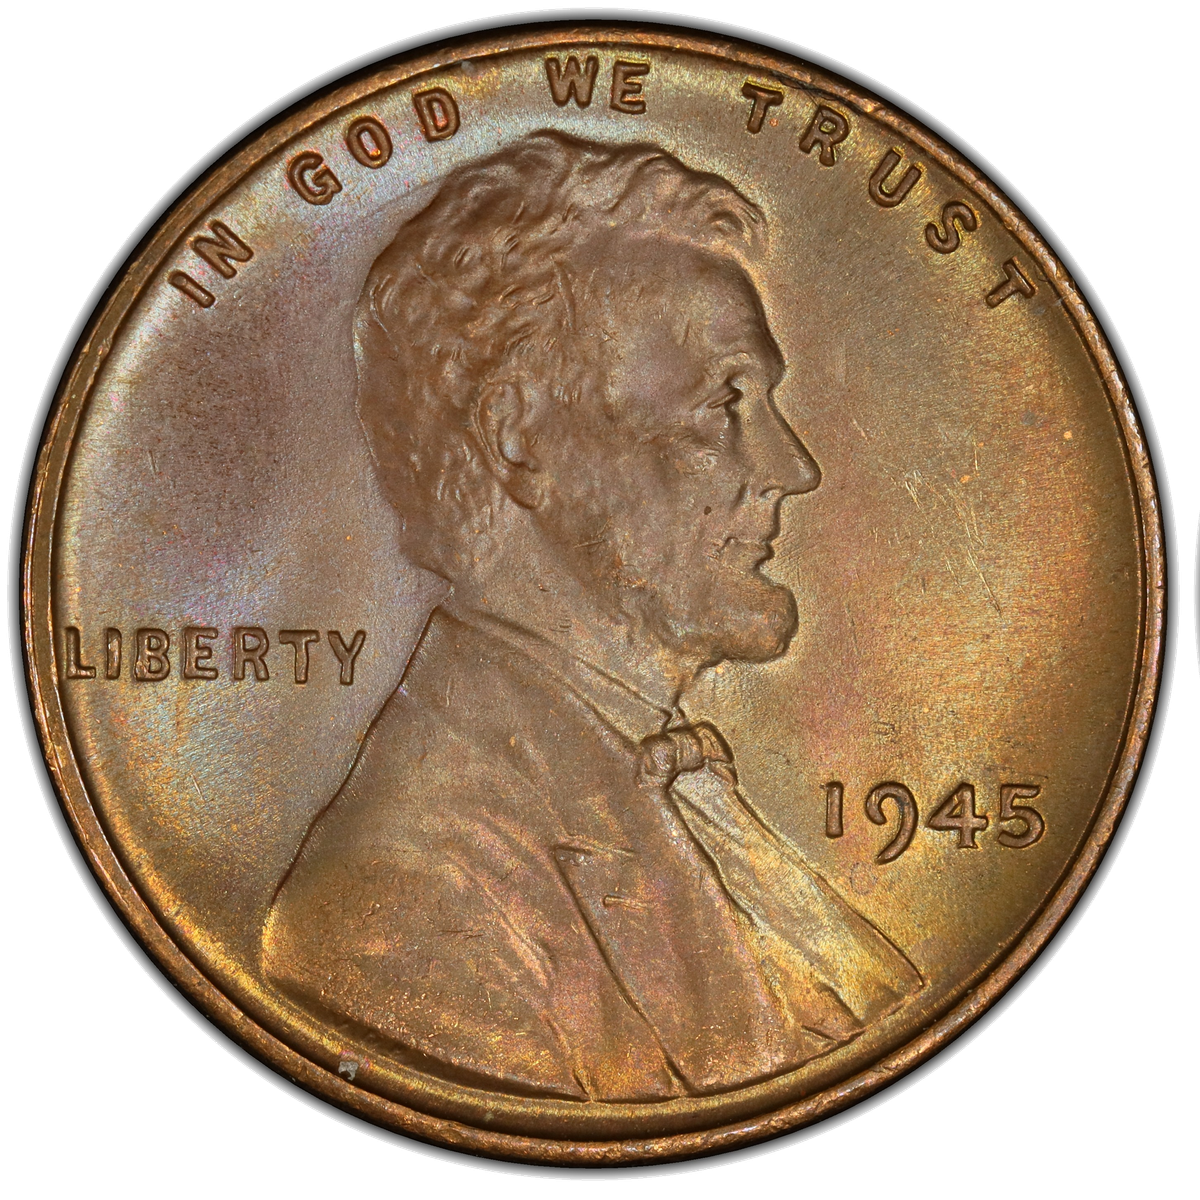
Good photo — sharp focus, side lighting reveals surface detail and diagnostic features
What to Avoid
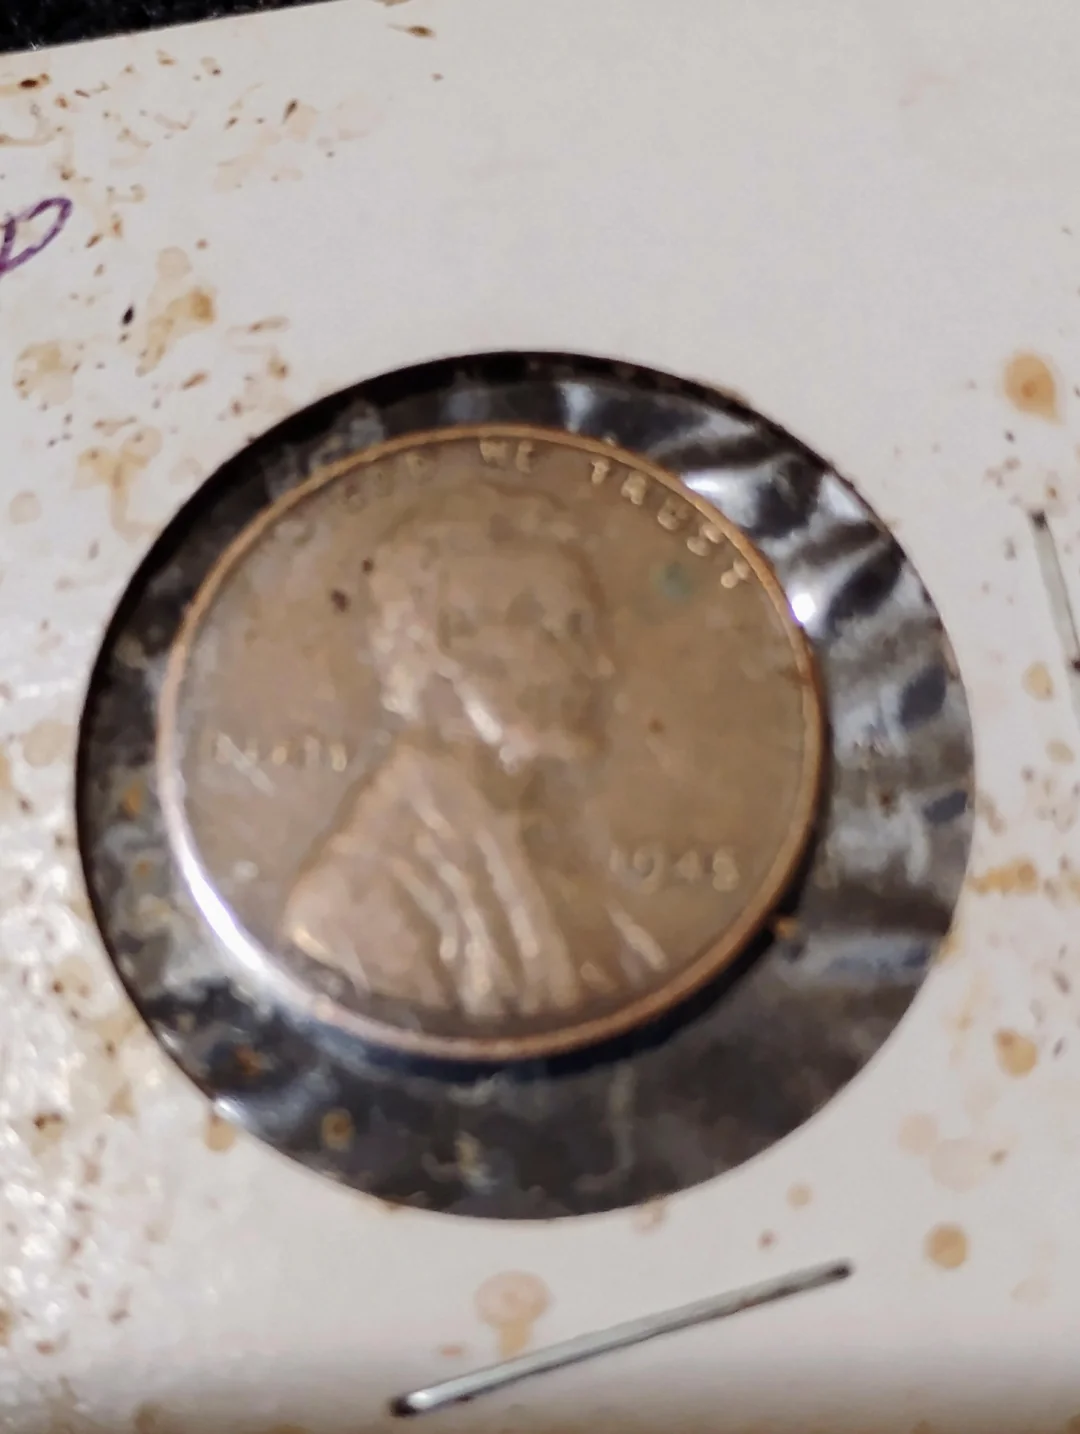
Poor photo — blurry, shot through a plastic holder with glare obscuring details
The Basics: Getting a Clear Photo
- Remove the coin from any flip, holder, or capsule — Photographing through plastic creates glare, haze, and reflections that obscure the very details you're trying to show. If you need to keep the coin in its holder for protection, try to photograph through the clearest part and eliminate reflections by adjusting your angle.
- Use a stable surface — Hand-held coin photos are almost always blurry. Place the coin on a flat, dark surface (a dark mousepad works well) and stabilize your phone or camera above it.
- Get close, but use the right method — Most phone cameras have a macro or close-up mode. Use it. If your phone struggles to focus at close range, try stepping back slightly and cropping the image afterward. Pinch-to-zoom is digital zoom and reduces quality — avoid it.
- Light from the side, not above — Direct overhead light creates "hot spots" (bright reflections) that wash out details. Position your light source at a 30-45 degree angle to the coin. This creates shadows that reveal surface details, die cracks, doubling, and other features.
What to Photograph
When posting a coin for identification, always include:
- Full obverse — The entire front of the coin, in focus
- Full reverse — The entire back of the coin, in focus
- Close-up of the area in question — If you're asking about a specific feature (possible doubling, die crack, unusual mark), include a zoomed-in photo of just that area
- Edge photo (when relevant) — For rim errors, collar issues, or clad vs. silver questions, a photo of the coin's edge is essential
Advanced: Axial Lighting
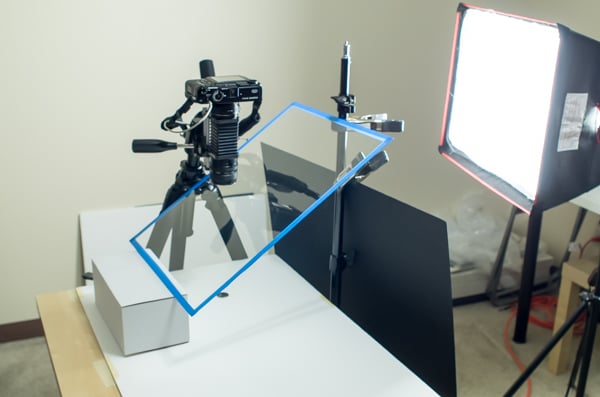
Axial lighting directs light straight down through a piece of glass angled at 45 degrees, illuminating the coin's surface without shadows. This technique is used by professional coin photographers because it reveals luster and surface quality without distracting shadows. While not necessary for basic identification, it's the gold standard for showcasing a coin's true appearance.
Quick Tips
- Use natural daylight or a daylight-balanced LED — yellow or warm light casts an inaccurate color
- A plain dark background (black or dark gray) provides the best contrast
- Include a scale reference (ruler or another coin of known size) if the coin's size is part of your question
- Upload the highest resolution your forum or platform allows — you can always shrink a high-res photo, but you can't add detail to a low-res one
0 Replies
Related Threads
- Rosa Parks Commemorative Coins: HR 916 Would Honor a Civil Rights Icon0 replies · 3w ago
- Olympic Coins for LA 2028 and Salt Lake City 2034: S. 2265 Explained0 replies · 3w ago
- The End of the Penny: What HR 4459 (MINT Act) Means for Collectors0 replies · 3w ago
- The $2.50 Coin Is Coming Back: What Collectors Need to Know About HR 56160 replies · 3w ago
- U.S. Mint Releasing 250,000 Special "July 4th" Privy Mark Declaration of Independence Quarters0 replies · 3w ago